Building the circuit
TIP
This design has adapted Polyfuge V.1.0 to be easily replicable without the need to order the custom PCB. You only need a breadboard to build the circuit.
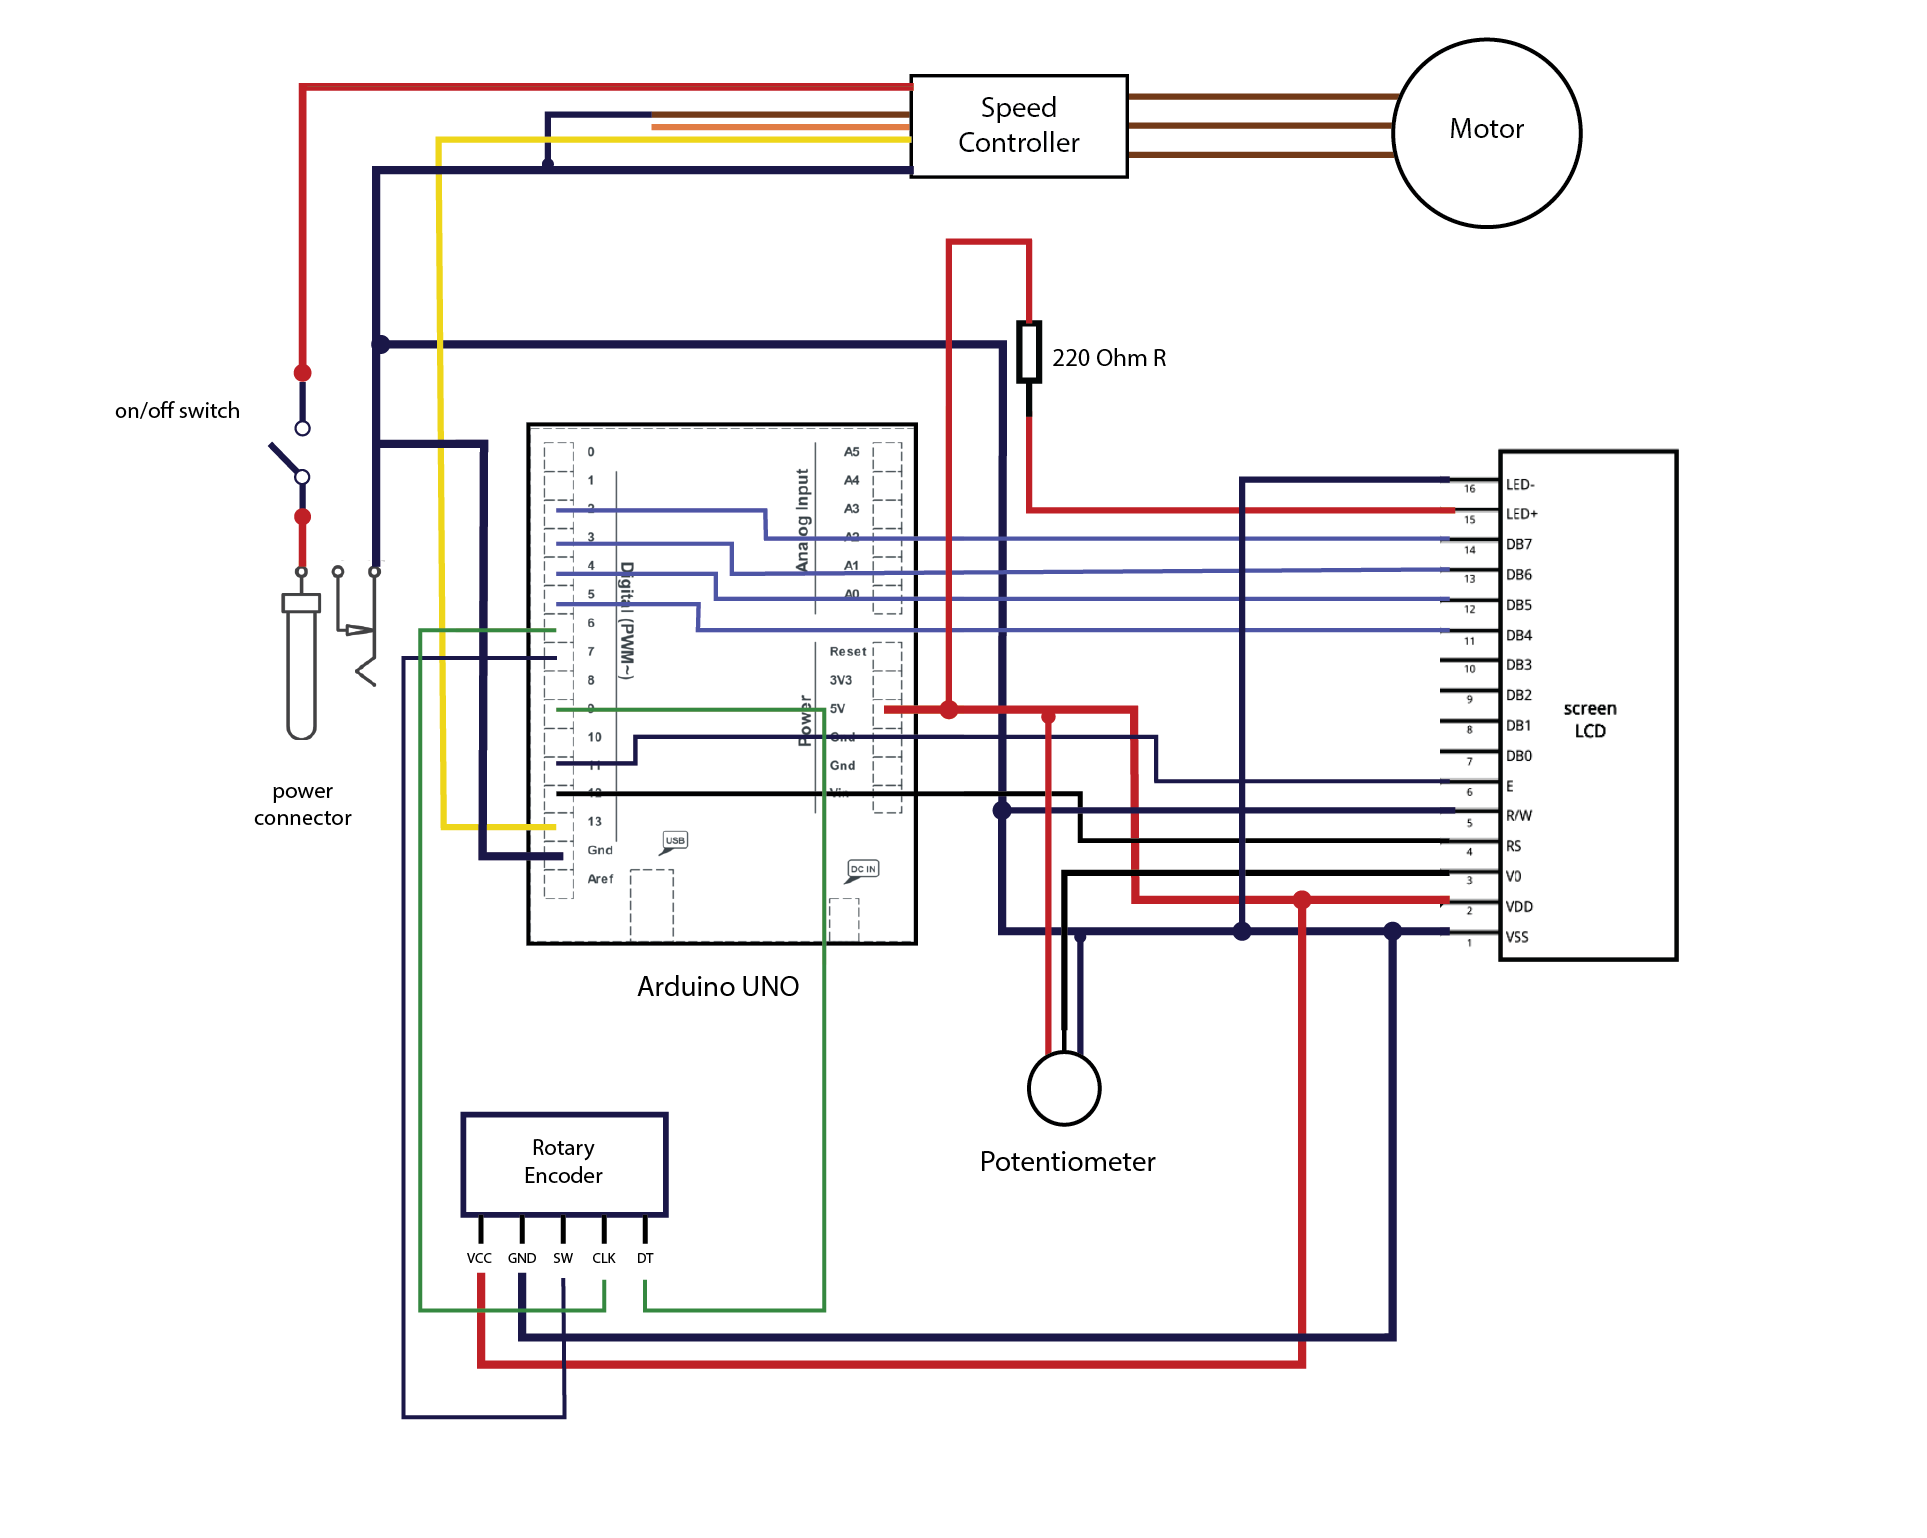
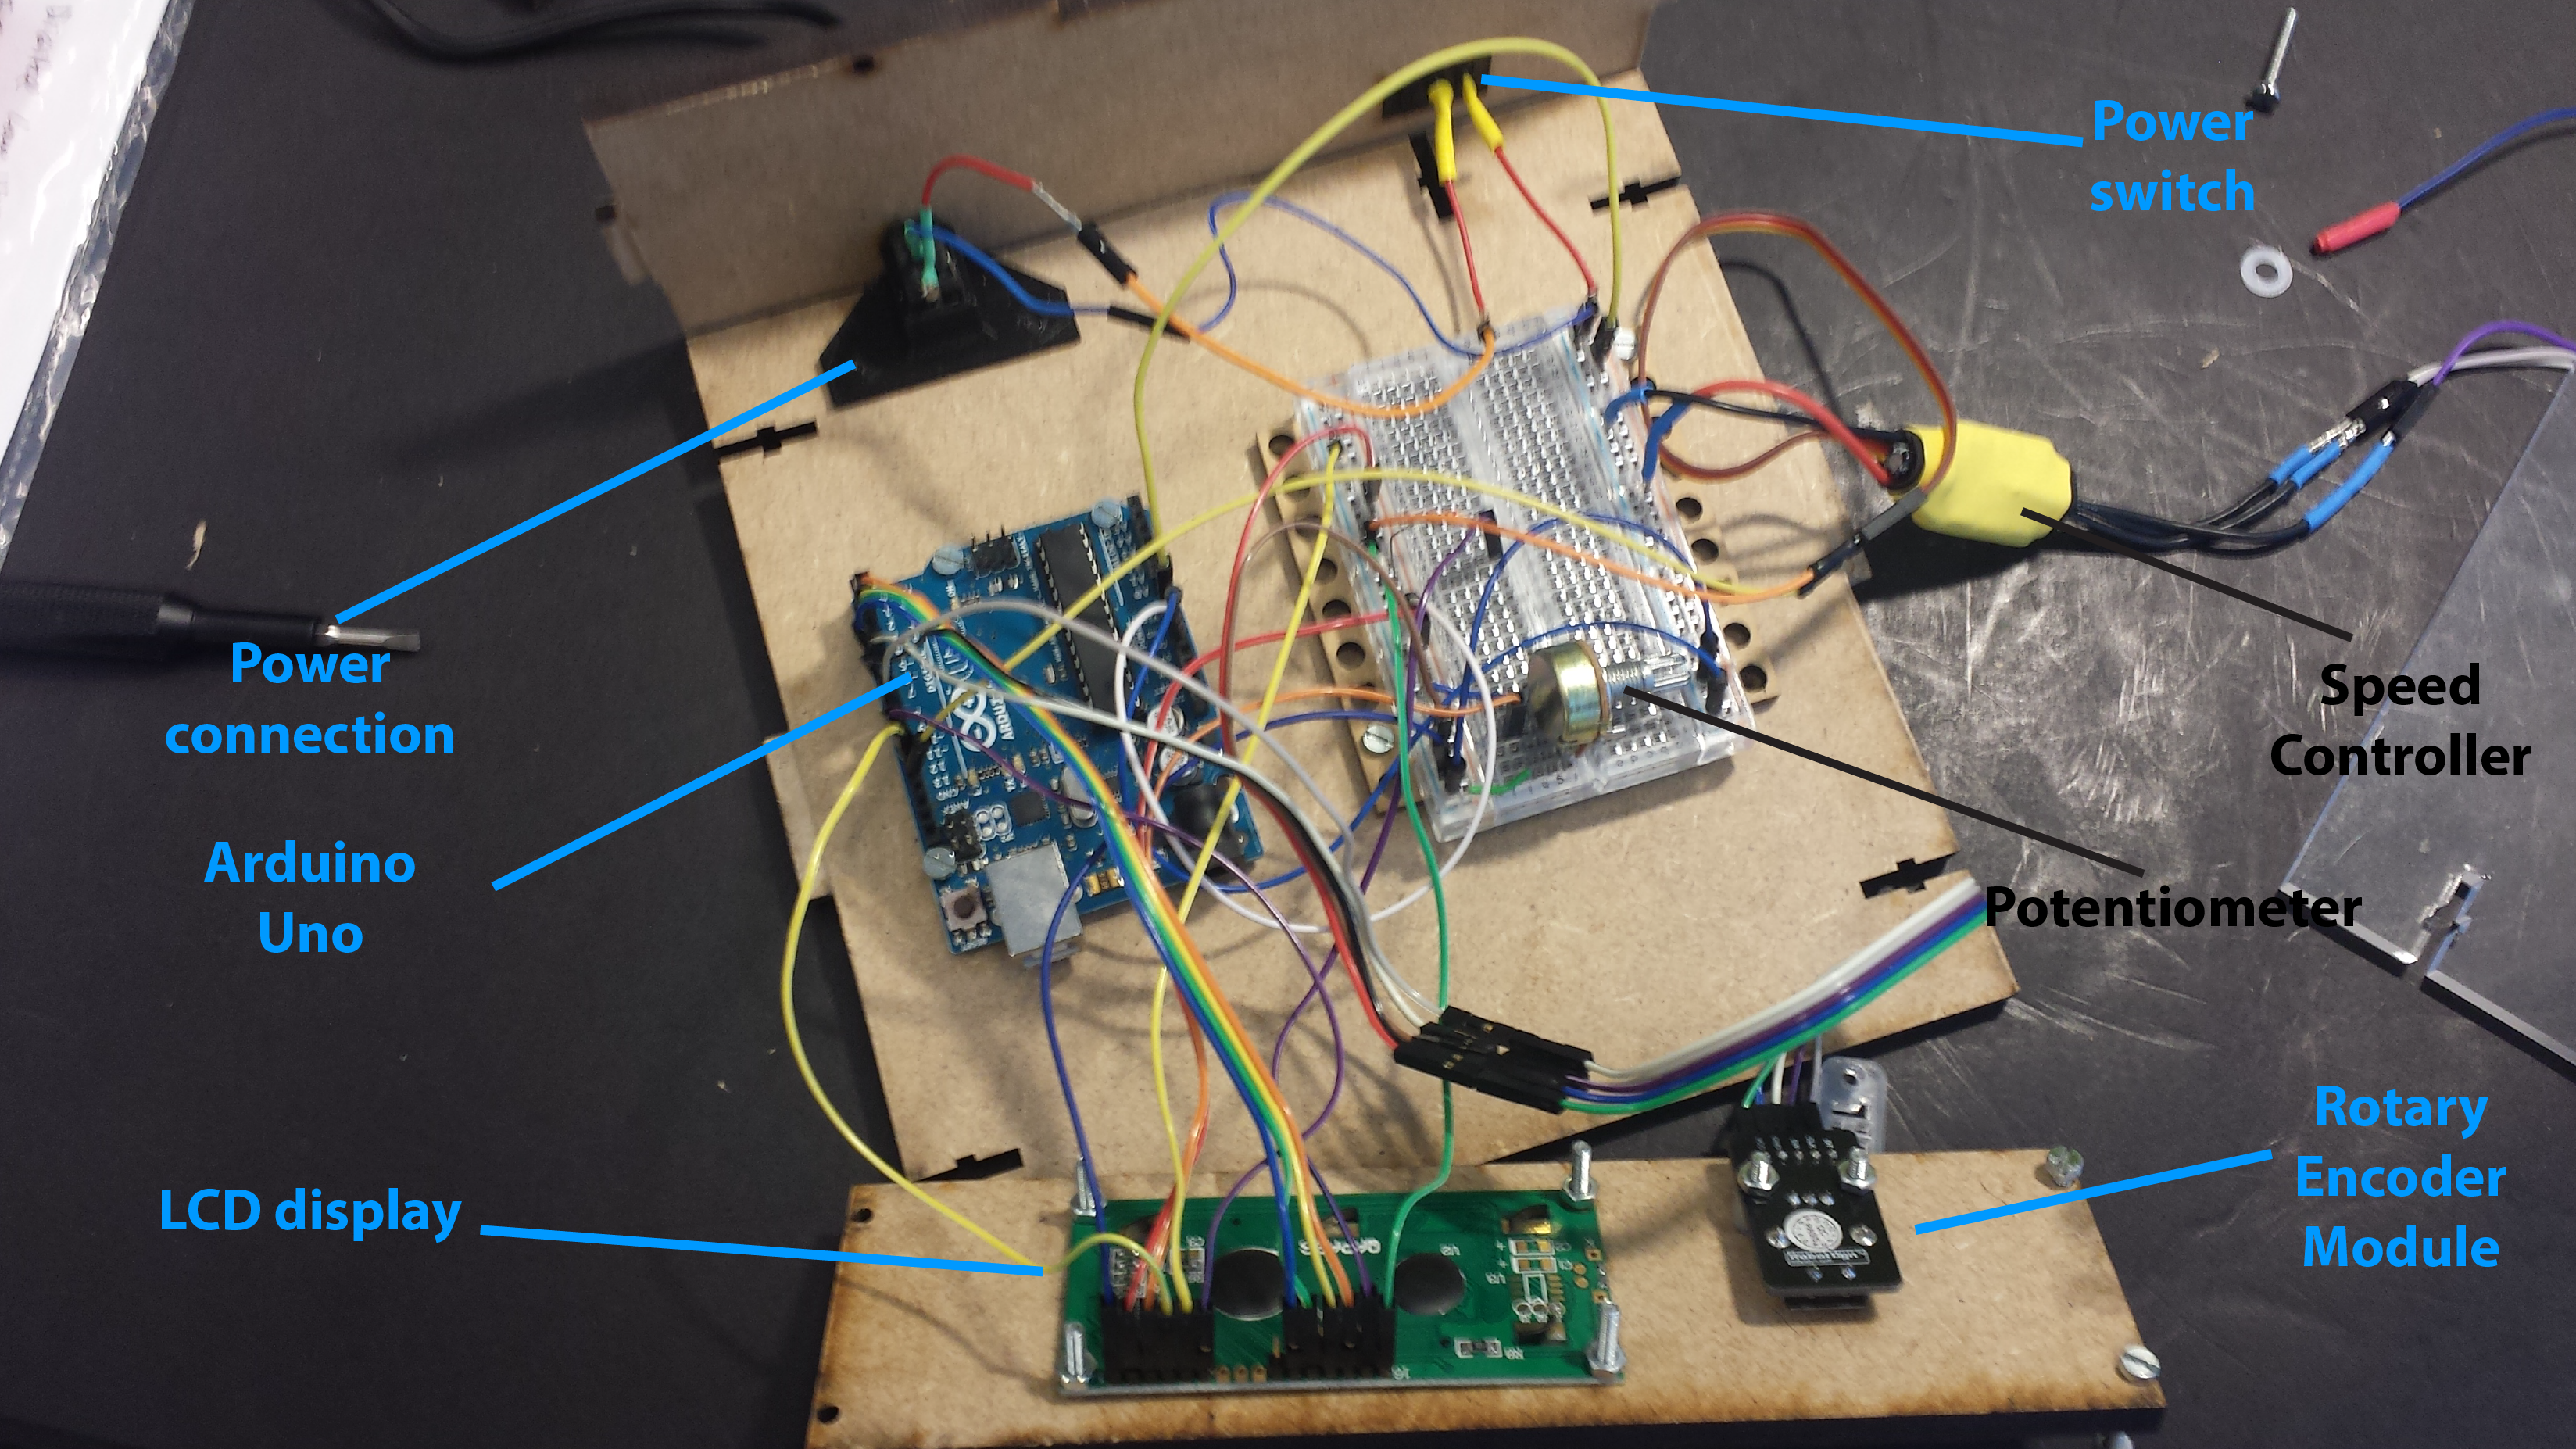
Overview of connections and components
TIP
Use these two images to guide you through the process. The schematic will help you to check the different circuit parts, and the assembly picture will give you an idea of how to mount the components to succesfully build the circuit.
Soldering
- Solder the wires to the power jack and the switch.
- Make sure to insulate the connections to avoid short circuits.
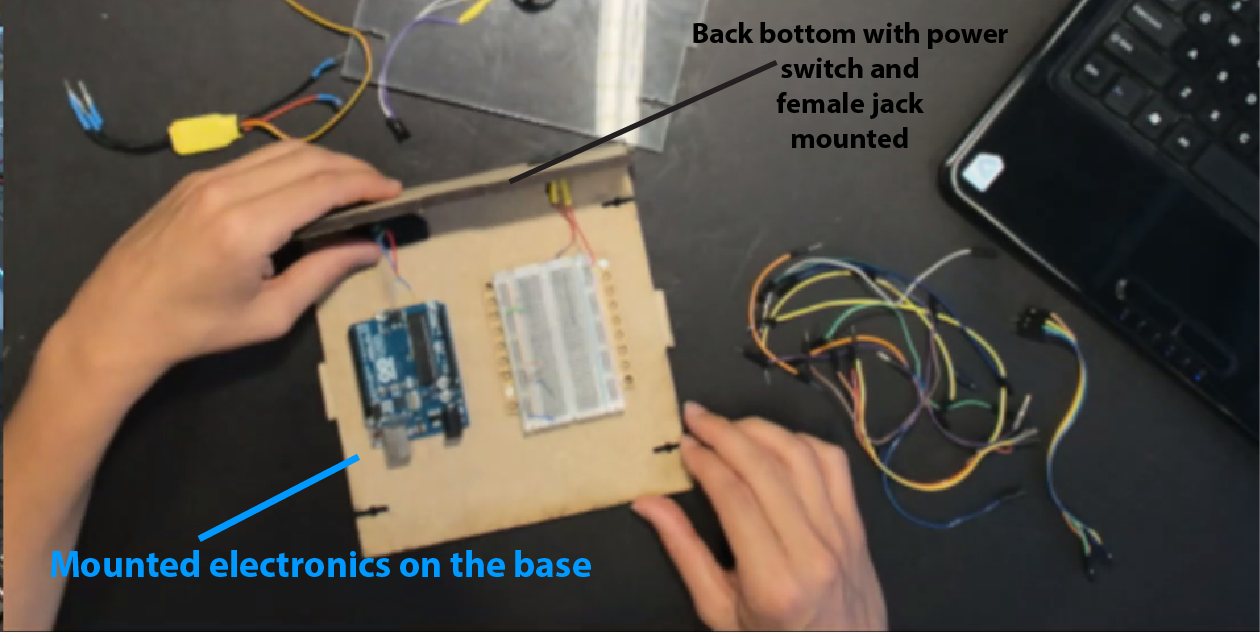
Mounting basic circuit components on the base
- Mount the Arduino UNO and the breadboard to the base.
- Assemble the power jack support to the base.
- Mount the power switch to the bottom back.
- Mount the bottom back to the base.
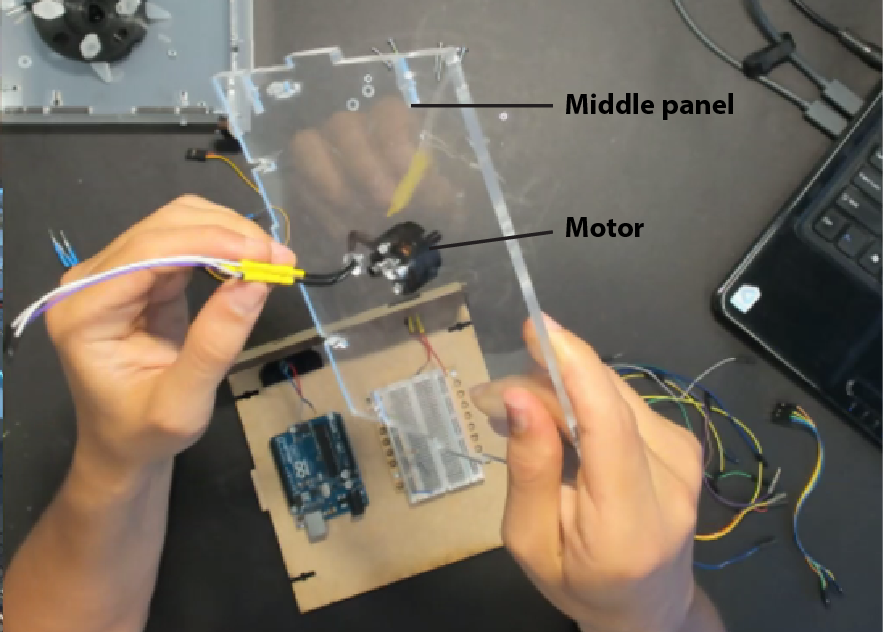
- Mount the motor on the Middle panel.
Assemble the circuit using the schematic above
TIP
Connect each circuit subset separately and test it. For instance the power circuit, the LCD circuit, the motor circuit, etc. Testing each set, will safe you from building the whole circuit without and finding out that it doesn't work later. At that point you will have to debug the whole system.
For example I connected the LCD separately,found a code example for LCD display and run it. I also did the same with the motor so on and so forth.
Run the code on the Arduino
Its time to compile the polyfuge code on your Arduino. Go to the next section to proceed.